Wednesday, April 20, 2011

TEXT ENTRY QUESTION

TEXT ENTRY QUESTION

let's do it now!!!

1.  Create several layers as following and rename each of the layer with an appropriate name.


2. In layer bg, draw any object to act as background of the application. For example, you can draw 3 rectangles to act as a background as following:


3. In layer text1, type the following text:


4. In layer text2, type the following text:


5. In layer step, type the following text:


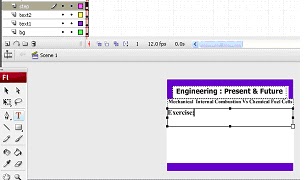
6. In layer question, type the question:


7. Please use the following types of Text for each text field in layer question:

Question1:
An internal….
Static Text

Type your Answer Here
Static Text

A place where users will type the answer
Input Text
Draw a box to cover the text field
A place where feedback will be viewed by the system
Dynamic Text


8. In layer button, drag two buttons from the Button Library as following:


9. In layer stop, type the following actionscript :

var respon;
var answers;
respon=””
answer=””
stop();


10. Behind Pause button, type the following actionscript:


11. If you want your application accept Enter key Press, edit the script as following :

12. Behind play button, type the following actionscript :

 on (release) {gotoAndPlay("Scene 1");
}


The Script will bring the application to the first scene if you have the scene.

13. Test the movie an you will get the following view:

 dah siap... huhu..

USING INPUT & DYNAMIC TEXT BOXES

USING INPUT & DYNAMIC TEXT BOXES

Let’s learn  how to do it….

1.         Open a new file in Flash by selecting File > New

2.         Choose a background colour. Then, type the text using Text Tool ( A ) from the tool box. Rename the layer with “soalan”.


3.         Make sure the properties panel is visible at the bottom of the screen. We are now going to look through the different options for text in Flash.


4.         In step 2, you created a text box. We are now going to convert this text box to an Input text box. This is the type of text box that the person using your flash file is able to type into.

5.         The next step is to make this box a variable, to do this enter a name for your variable in the variable name cell. I have called my variable name. the variable name can be anything you like really, providing you remember it and enter the same name in the dynamic text boxes cell.


6.         Insert a button. How to get from the libraries? Go to Window menu > Common Libraries > Buttons. Then, choose the button that you like. Drag button to the stage. Right click at the button and choose Actions. Type the action script to run the button.


7.         Insert a layer stop. Right click and choose Actions. Write the action script for layer stop.


                                var stands for variable. We put name as our variable just now.
                                Name=” ” means that name equal to any input that you wished.
                                                It doesn’t assign to any value.

8.         Insert a layer Jawapan and insert keyframe at Frame Number 5. Then, type the text using Text Tool. Next, change it into Static Text. When you want to display the input variable, change into Dynamic text. When you want to type the normal text, change it into static Text.

                   Static Text = for the normal text that you always used.
                   Dynamic Text = for display or print the input variable or known as output.
                   Input Text = for input from the user.

                   Unclick the Show border around text. Put the variable as “name”.


9.         Right click keyframe at Frame Number 5 in layer jawapan and choose Actions. Put action script  stop();


10.       You should now be able to check that your text boxes work by selecting
Control > Test Movie. When you type your text into the input text box, you will see it appear in the dynamic text box.

Now let see… yu hooo

dah siap pun.... huhu


Saturday, April 9, 2011

Class Activity 3 : frame by frame animation (cell animation) – Using movie clip symbol

1.         First download the image files.
2.         Create  a new file. Then create a symbol by clicking at Insert > New Symbol
3.         Choose Movie clip symbol and you will see another screen is opened in Flash beside your flash file.


4.         Click at File > Import file to stage. Choose the image file that you want to import. If the names of your image files are as followings…. Well you need to import the first file only.


5.         When the following pop-up window is displayed. Click Yes


6.         Automatically all images will be arranged on stage.


7.         Save your file.
8.         Click back at scene 1.
9.         Drag the symbol 1 to the left side of the stage.
10.       Insert another keyframe and move the location of the bird to the right.


11.       Insert Motion Tweening in between the two keyframes.


12.       Save your file.
13.       Test your movie


Class Activity 2 : Multiple Answer Question

1. Create a question and answer.


2. Convert the answer A, B & C into symbol with press F8.


3. Insert layer STOP and type the action script stop();


4. Insert layer CORRECT and insert keyframe at Frame Number 5. Type the text for correct answer with using Text Tool. At keyframe Frame Number 5, type the action script stop();


5. Next, insert layer INCORRECT and insert keyframe at Frame Number 10. Type the text for incorrect answer with using Text Tool. At keyframe Frame Number 10, type action script stop(); also.


6. Then, type action script for button A, B & C


7. Test the movie with press Ctrl + Enter.

     Well done!!! yooooo